
TABLE OF CONTENTS
- To view the connection speed for a Wi-Fi or Ethernet adapter, use these steps:
- How to check network adapter speed using Control Panel
- How to check network adapter speed using Command Prompt
- How to check network adapter speed using PowerShell
To view the connection speed for a Wi-Fi or Ethernet adapter, use these steps:
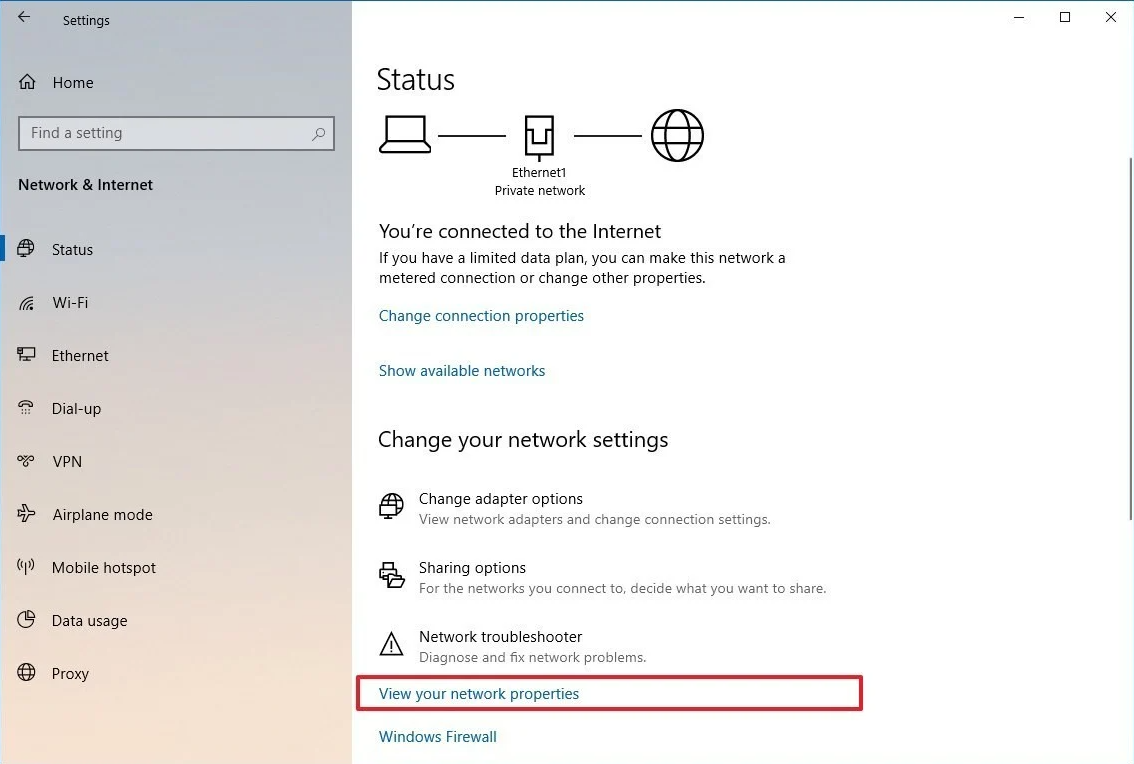
- Open Settings.
- Click on Network & Internet.
- Click on Status.
- Under the "Change your network settings" section, click the View your network properties option.
- Under the "Properties" section, find the network adapter (Wi-Fi or Ethernet).
- Determine the connection speed in the Link speed (Receive/Transmit) field.
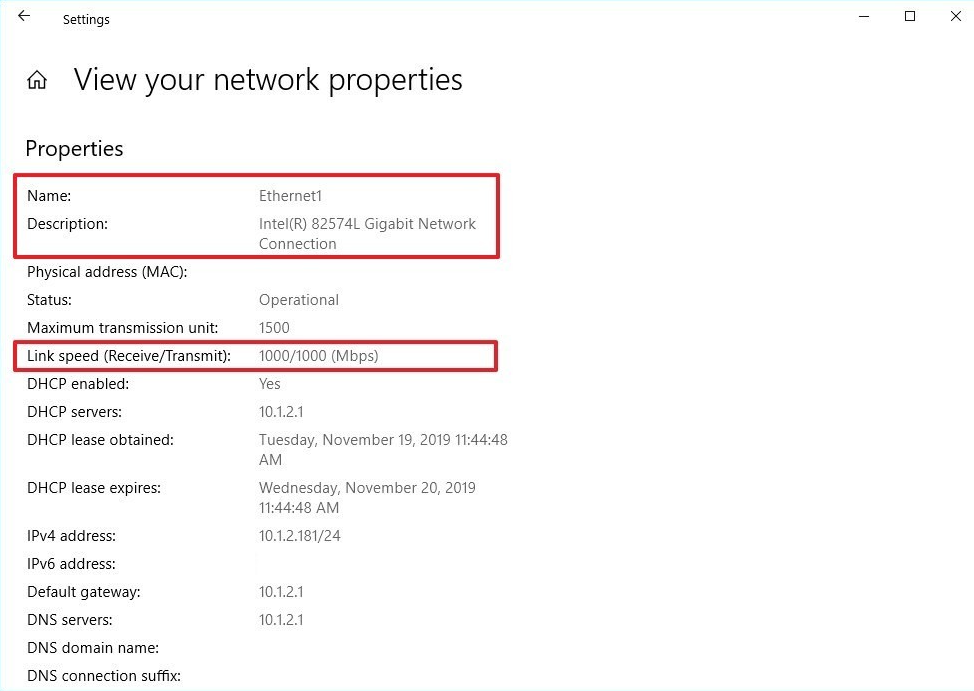
Once you complete the steps, you'll know the adapter's speed to connect to the network.
How to check network adapter speed using Control Panel
- Open Control Panel.
- Click on Network and Internet.
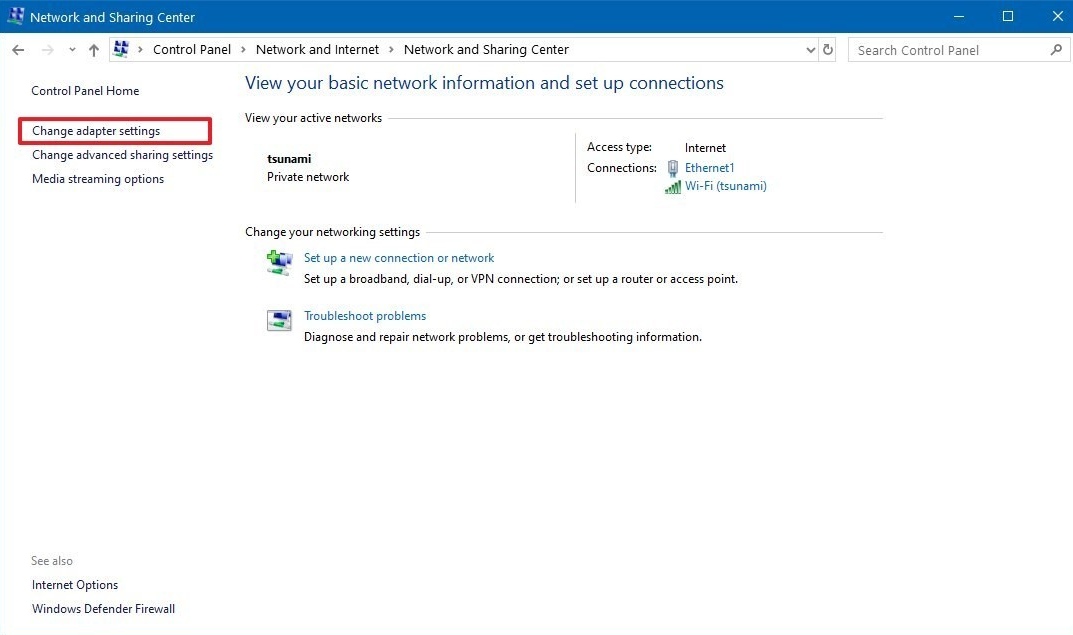
- Click on Network and Sharing Center.
- Click the Change adapter settings in the left pane.
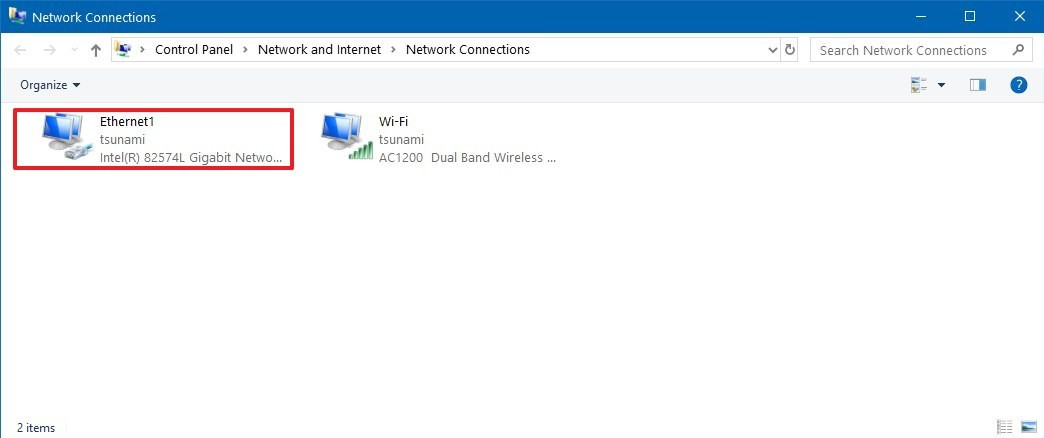
- Double-click the network adapter (Ethernet or Wi-Fi).
- Check the connection speed in the Speed field.
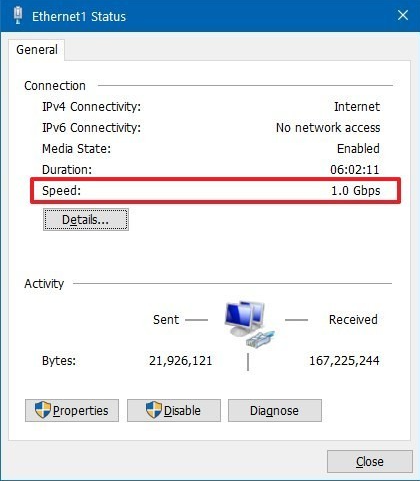
Quick note: If you're looking at a Wi-Fi adapter, you can also confirm the signal quality.
After you complete the steps, you'll better understand the connection speed for the Ethernet or Wi-Fi adapter connected to the network.
How to check network adapter speed using PowerShell
To check the Ethernet or Wi-Fi connection speed on Windows 10 with PowerShell, use these steps:
- Open Start.
- Search for PowerShell and click the top result to open the console.
- Type the following command to determine the connection speed for all the Ethernet and Wi-Fi adapters and press Enter:
Get-NetAdapter -Name *
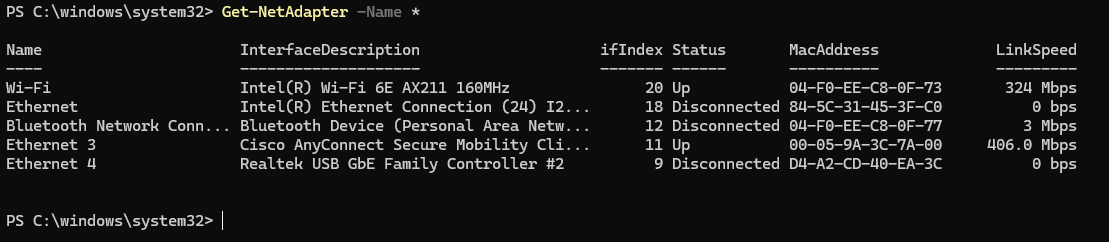
- Check the Wi-Fi or Ethernet network card connection speed.
After completing the steps, the PowerShell output will display the connection speeds in a user-friendly format (for example, 780 Mbps and 1 Gbps).
Was this article helpful?
That’s Great!
Thank you for your feedback
Sorry! We couldn't be helpful
Thank you for your feedback
Feedback sent
We appreciate your effort and will try to fix the article